viernes, 28 de enero de 2011

Kinect bajo Linux


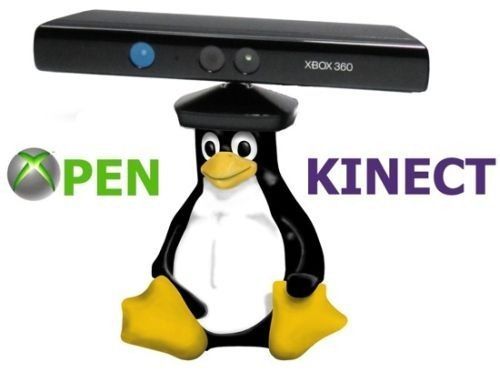
Pues claro que no me he equivocado con el título del post, acabo de ver en un artículo de linux magazine en español, que apenas a unas cuantas horas de haber sacado al mercado el nuevo juguetito de Microsoft llamado Kinect, un hacker consiguió hacerlo funcionar bajo GNU/Linux, es decir, no precisó de días para hacerlo sino de algunas horas. En realidad el dispositivo no fue hackeado, sino que sólo se le aplicó ingeniería inversa a su protocolo de comunicación. Sin más aquí dejo algunos videos que muestran que se ha podido hacer:

Drivers libres para kinect en: http://git.marcansoft.com/?p=libfreenect.git 

Video demostrativo:


Vídeo de Florian Echtler utilizando el Kinect para manipular una aplicación multitouch


Descarga del software que permite usar Kinect como interfaz multitouch:
http:// tisch.sourceforge.net/


Prueba de concepto de entorno 3D real de Oliver Kreylos: 
http://idav.ucdavis.edu/~okreylos/ResDev/Kinect/index.html


Entorno 3D real de 180 grados:


Fuente: Linux Magazine en Español.

lunes, 24 de enero de 2011

Manual de Grails y manual de Hibernate.


En vista que he tenido poco trabajo que realizar, me he dedicado a aprender un par de frameworks para Java (J2EE), ya que el mercado exige desarrolladores del Java Enterprise Edition, pues bien aquí dejo un par de libros para esos frameworks, los cuales son:


  • Hibernate: es una herramienta de Mapeo objeto-relacional (ORM) para la plataforma Java (y disponible también para .Net con el nombre de NHibernate) que facilita el mapeo de atributos entre una base de datos relacional tradicional y el modelo de objetos de una aplicación, mediante archivos declarativos (XML) o anotaciones en los beans de las entidades que permiten establecer estas relaciones.
  • Grails: es un framework para aplicaciones web libre desarrollado sobre el lenguaje de programación Groovy (el cual a su vez se basa en la Java platform). Grails pretende ser un marco de trabajo altamente productivo siguiendo paradigmas tales como convención sobre configuración o no te repitas (DRY), proporcionando un entorno de desarrollo estandarizado y ocultando gran parte de los detalles de configuración al programador. 
La verdad es que Grails simplifica bastante el hecho de desarrollar, para ejemplo el siguiente: con tan sólo 7 líneas de código somos capaces de crear un sistema completo con persistencia en base de datos que contenga las operaciones básicas (altas, bajas, consultas y modificaciones) para una tabla que contenga dos campos. Estas 7 líneas de código también crean la base de datos en el manejador de base de datos (RDBMS), así mismo también son suficientes para tener la interfaz web.


El manual de Hibernate lo pueden descargar de aquí.
El manual de Grails lo pueden descargar de aquí.
Para quien quiera ver un tutorial para desarrollar con Netbeans, el enlace está aquí.

lunes, 10 de enero de 2011

Memorias de un Administrador de Redes: Casos (o caos?)


Leyendo un poco de información sobre cuestiones de redes y Linux en la Internetwork me encontré con este enlace, que muestra tres casos que tienen que ver con las redes, dispositivos capa 3 y capa 2 de Cisco y algunas otras cosillas como servidores DHCP. 

Lo posteo porque creo que es interesante para todos aquellos que estudiamos el CCNA de Cisco. 

Un fragmento dice:

"Muchos switches estropean la red a
pesar de las buenas intenciones de los
administradores. El objetivo es normalmente
mejorar la resistencia de la red,
pero una mala configuraci—n puede
crear r‡pidamente un acelerador de part
’culas virtual. Un bucle se caracteriza
por el hecho de que mantendr‡ a los
paquetes dando vueltas por la red hasta
el infinito. Si la red posee dos o m‡s
caminos redundantes y los nodos
env’an tramas a mœltiples interfaces, el
resultado podr’a ser un lazo, en el que
los paquetes se mantienen viajando en
c’rculos infinitos.
Como las tramas Ethernet no soportan
la cuenta de saltos o valores del tipo
tiempo-de-vida, la red no se dar’a
cuenta de esta circunstancia, dejando
que los paquetes circulen para siempre.
Para evitar este desastre, gente inteligente
dise–— el Protocolo Spanning
Tree (STP) [4], donde todos los switches
de una red negocian un switch ra’z."


El documento lo pueden bajar de aquí.
La fuente original la debemos a Linux Magazine en Español.

lunes, 3 de enero de 2011

1,760 PlayStation 3s form new supercomputer - Air Force News | News from Afghanistan & Iraq - Air Force Times

Putting 1,760 Sony PlayStation 3s in one room might make for the most awesome “Call of Duty: Black Ops” game ever. And, as Air Force researchers have discovered, they can also create the Defense Department’s largest interactive supercomputer.

The Air Force Research Laboratory at Wright-Patterson Air Force Base, Ohio, formally unveiled the supercomputer, nicknamed the “Condor Cluster,” earlier this month.

Not only is it fast — the laboratory’s high performance computing director says it’s about the 35th-fastest computer in the world — and “green,” it was cheap, too. The laboratory spent about $2 million, which Wright-Patterson says is less than one-10th the cost of using traditional computer equipment.

“We’re striving hard to make affordable and constrained systems, where they can really use them and make a difference,” the director, Mark Barnell, told reporters Dec. 2.

The Condor Cluster will be used to process high-resolution satellite images and boost surveillance capabilities. According to the Air Force, scientists will be able to monitor a 15.5-mile area in real time using the cluster and aerial surveillance.

Researchers also want to use the supercomputer for neuromorphic computing, which mimics the human brain’s ability to solve complex problems. The supercomputer has applications capable of reading 20 pages per second with up to 30 percent of the characters removed and recovering all the words without error, said Barnell, also the Condor Cluster project engineer.

“We have quite a few research and development efforts working on those kind of applications to do confabulation and prediction,” Barnell said, “and that will open up a variety of areas which could help with a lot of other efforts and a lot of the areas in which the Air Force would like to go.”

The Condor Cluster isn’t just for Air Force Research Laboratory scientists. It is available for Defense Department users for free on a shared basis.

It’s also energy efficient. The Condor supercomputer is about the seventh “greenest” computer in the world, Barnell said.

The Condor Cluster can achieve about 1.5 GigaFLOPS — floating point operations per second, the unit by which supercomputing power is measured — per watt of computing power. A typical supercomputer can reach only about one-15th of that.

Although building a “green” system was important, Barnell said a motivation behind building a power-efficient machine was to create something that could work well in the field.

“If we’re going to help out and bring it out to … the war fighter, we also know that there’s a size, weight and power constraint in the real world,” Barnell said. “We see a direct relationship, and we’re motivated and driven by those constraints as well.

“And when the two match up — not just because we get lucky, I think more because we know where we’re going — then we get a double-win.”

Source: 1,760 PlayStation 3s form new supercomputer - Air Force News | News from Afghanistan & Iraq - Air Force Times

Control de monitores y proyectores de vídeo en Linux

Primero que nada les envío una felicitación con motivos del año que recién comienza a quienes sigan este blog.


Bueno, por otra parte les hablaré sobre el control de monitores y proyectores de video en Linux (principalmente para las laptops), que como ya muchos sabrán es un dolor de cabeza el no saber de que manera gestionarlos mediante el teclado, ya que en su mayoría estamos acostumbrados a presionar un par de teclas y enviar la señal al proyector.

Yo tengo una laptop de la marca Compaq y por defecto KDE tiene una configuración para el teclado multimedia que me permitía usar precisamente esa combinación de teclas para controlar el proyector de video, sin embargo a partir de la versión 13.1 de Slackware hubo un cambio en el servidor X.org, el cual ya no ocupa el tradicional archivo de configuración /etc/X11/xorg.conf, y me supongo que debió llevar más cambios no sólo ese, razón por la cual ya no funciona este método. Ahora tengo que pelearme con el sistema para que de alguna manera se pueda seguir empleando el proyector.
Pues bien, parece ser que he encontrado una solución, desgraciadamente no he tenido tiempo de probarla, se basa en el uso de RandR (Resize and Rotate).

Gracias a nuestros amigos de Linux Magazine en español, he encontrado un artículo bastante explicativo de como emplear esa herramienta para gestionar esos proyectores. El archivo lo puedes descargar de la página de LinuxMagazine.com aquí.

Fuente Original: Linux Magazine en Español.

miércoles, 29 de diciembre de 2010

Skinput, becoming your arm into a touchscreen


I've received at home a copy of ACM XRDS Magazine, and wow!!!, it's really impressive one issue treated there. The article name is "Interfaces on the Go".

As I said, I got shocked 'cause it's something I never expected, Microsoft and Canergie Mellon's HCI Institute have been hard working in this research. 
I see that Microsoft is more than just Windows OS'es and Office software.

There's one new concept that it's being introduced, micro-interactions that refers to interactions that take a lower time to initiate and complete (tipically lesser than 4 seconds, this time it's to compare with interaction with cellphones or similar devices interaction), so that the user can quickly return to the task at hand.
There are a couple of techniques that are being developed:
  1. Muscle-computer interfaces.
  2. Bio-acustic sensing.
Most impressive technique to me is Bio-acustic sensing 'cause it's a technique that allows the skin (yes!!, the skin) to be used as a finger input surface, that's why it's name is Skinput. Regardless of it it seems that it's better to understand an image rather than a speech.

Please forgive me if I have misspellings, I'm just trying to improve my English so I decided start posting in this language.

Original source: XRDS Magazine, summer 2010 issue 16.4

lunes, 20 de diciembre de 2010

Packetfence, blocking unwanted traffic in the LAN

Now that I'm "fan" of linux.com via facebook, I saw this little tuto regarding to "Block Traffic", I just decided to post it 'cause already I'm Network Manager and I might use this information in not so far future. Well here comes post.


Packetfence is a very powerful Network Access Control tool. Using Packetfence you can control and block unwanted traffic on your network. Want to block P2P services like BitTorrent, or keep mobile devices like iPhones and Android phones off your wireless network? Packetfence gives you the kind of fine-grained control you're looking for.

Packetfence is officially supported on Red Hat Enterprise Linux (RHEL) and CentOS. With those two distributions you can quickly get Packetfence up and running (Unlike on Ubuntu which I recently outlined in "Install and Configure Packetfence on Ubuntu Linux"). But you are not relegated to command line only (as you will find in Ubuntu). With Red Hat or CentOS you will find a powerful web-based tool at your fingertips. With this tool you can easily manage Packetfence. But not all aspects of Packetfence can be handled from the web-based GUI.
 
Assumptions

What I want to demonstrate is how to block specific traffic on your Packetfence-enabled network. I will assume just a few items:
You already have Packetfence installed and working properly (I will be demonstrating on CentOS 5)
You have administrative rights to the machine Packetfence is installed on.

That's all. I am going to demonstrate how to block two types of traffic. First I am going to demonstrate how to block P2P traffic (such as Limewire) which will be followed by how to block iPhone/Android phone access to your network.
 
Adding the Final Piece: Snort

In order for Packetfence to block specific services or devices you have to enlist the help of Snort. Snort is a network intrusion detection system. In order to install Snort, follow these steps:
 
  1. Open up a terminal window.
  2.  su to the root user or use sudo.
  3.  Issue the command yum install snort
With Snort installed you are almost ready. However, you will need to get rules so that Snort knows what is an intrusion. By default Snort installs without any rules. In order to add rules you have two options:
 
  • Write your own rules.
  •  Download and install pre-configured rules from the Snort Website 
I highly recommend you opt for the latter (as writing your own rules will take a lot of time and effort). To do this you will need to register on the Snort web site. You can sign up for the free account and still download rules. Once you have signed up and activated your account, download the rules and then follow these steps:
 
  1. Open up a terminal window.
  2. Change to the directory the snortrules-snapshot-XXX.tar.gz file was downloaded to (Where XXX is the release number that matches the Snort release installed on your machine.)
  3. Issue the command tar xvzf snortrules-snapshot-XXX.tar.gz (Where XXX is the release number).
  4. Change into the newly created rules folder.
  5. Issue the command cp * /etc/snort/rules/
You now have all the rules you need for Snort to work. Start up Snort with the command /etc/rc.d/init.d/snortd start. You should now see /var/log/messages starting to fill up with information from Snort. Now it's time to re-configure Packetfence.
 
Enable Snort

Since you just added Snort, you need to make Packetfence aware. To do this open up the /usr/local/pf/conf/pf.conf file and add the following:

[services]

snort=/usr/sbin/snort


Save the file and restart Packetfence with the command /usr/local/pf/bin/pfcmd service pf restart — Packetfence is now using Snort.
 
Choosing the Correct Template

Before we can get into the actual configuration and blocking of services/devices, we first have to re-configure Packetfence to run in a mode other than testing. In the first article I illustrated how to configure and start Packetfence in testing mode. This is great for making sure things are working as Packetfence will only log events (not act upon them). In order to get Packetfence to actually act upon a violation, you have to reconfigure it to run using a different template. The templates you can choose from are:
 
  • Test mode
  • Registration
  • Detection
  • Registration & Detection
  • Registration, Detection & Scanning
  • Session-based Authentication

     
The template you want to choose is Registration, Detection & Scanning. In order to do that open up a terminal window and do the following:
 
  • su to the root user.
  • Change to the /usr/local/pf directory.
  • Issue the command ./configurator.pl .
  • Select option [5] for Registration, Detection & Scanning.
  • Answer all of the questions (this will be similar to your initial installation, as shown in the first article).
  • Now cd into the /usr/local/pf/bin directory.
  • Issue the command ./pfcmd service pf restart.
     
Packetfence is now working in the proper mode to act against violations. However, it doesn't know what is a violation. For that we have to turn to the /usr/local/pf/violations.conf file.
 
Enabling Specific Violations

In the violations.conf file you will see a long laundry list of violations. Each violation section looks like:

[2000334]
desc=P2P (BitTorrent)
priority=8
url=/content/index.php?template=p2p
disable=Y
max_enable=1
trigger=Detect::2000334,Detect::2000357,Detect::2000369


The above violation is for BitTorrent connections. As you can see this violation, in its default state, is disabled. To enable this violation all you need to do is change the line:

disable=Y

to

disable=N

You will find, listed in the violations, the P2P violation and the Android device violation. Enable both of those, save the file, and restart Packetfence. Now, any device that violates the enabled violations will be denied access and will be logged.
 
Web Interface


As I mentioned, Packetfence does come with a spiffy Web interface that allows you to manage your Packetfence-protected network. To access this tool open up your browser and point it to https://ADDRESS_TO_SERVER:1443. When you arrive at this site you will have to log in with your admin credentials (configured during installation of Packetfence). Upon successful authentication you will find yourself at the Packetfence web interface (see Figure 1). Here you can manager each node on your network, add users (for authentication), start/stop various pieces of Packetfence, and configure Packetfence.

From the Violation tab you can even enable/disable violations using a simple drop-down to select the particular violation you want to enable.
 
Final Thoughts


As far as Network Access Control goes, you will be hard-pressed to find a more powerful tool than Packetfence. Not only is it powerful, but once installed and configured it is easy to administer and manage. Of course, there is so much more that can be done with Packetfence. For more information read through the outstanding guides offered on the Packetfence Documentation page.

Original source can be found at linux.com